Particularly low temperatures lead to the fact that the rooms in which the chickens are housed require insulation, and this can cost a lot. Therefore, many breeders are interested in what is a chicken coop in a polycarbonate greenhouse, how to build it yourself, and will it provide reliable protection to birds?

Pros and cons of a polycarbonate chicken coop
Before starting work and looking for all the necessary materials and a place for arranging a polycarbonate chicken coop, you should familiarize yourself with its pros and cons.
Advantages the buildings:
- Occupies a small plot of land.
- The construction of separate premises for chickens does not require a large amount of money.
- Chickens are provided with excellent protection not only from low temperatures, rain and other surprises of nature, but also from small predators who want to eat poultry meat.
- A competent approach allows you to fully preserve the adult livestock and contributes to the emergence of their own young.
- Polycarbonate is easy to clean. Light dirt is easily washed off under the pressure of water from the hose. If more serious stains appear, take any dish detergent, apply it to a cloth, wipe it off and rinse with water.
Disadvantages:
- Mandatory insulation of a polycarbonate greenhouse, including all structures (from foundation to walls). All this requires material investment and time.
- Equipping with additional equipment usually absent in the greenhouse (perches, nest houses, water tanks, feeders, etc.).
- As soon as spring has come, and the chickens can already walk in the fresh air, all items from the second point will have to be transferred to the summer room.
Be careful not to use ammonia-based mixtures on polycarbonate, as it will erode the surface of the sheets. These thermoplastics are resistant to most other common chemicals.
Step-by-step manufacturing instructions
Before placing chickens indoors, it is required to make a schematic plan of the greenhouse and indicate:
- place for roosts;
- nests;
- area for walking.
Required materials and tools
When building a hen house made of polycarbonate, you cannot do without:
- sand;
- cement;
- rubble;
- plasticizer;
- formwork boards;
- twine;
- straw and sawdust;
- plywood sheets;
- proper polycarbonate;
- self-tapping screws;
- drills;
- deep vibrator;
- knives;
- jigsaw;
- awl or thin sharp screwdriver;
- building level;
- hammer.
It is best to take materials a little more than the required amount, because during construction you can reveal a marriage or make some kind of mistake.
Preparatory work
Preparatory work includes the development of a chicken coop project, which will allow you to calculate the required amount of building materials.
The choice of location plays an important role in planning. So, a plot of land for a room should be located on a plain. When erecting a chicken coop on a hill, there is a high risk of collapse of the walls and / or roof under the influence of strong winds, and in the lowlands the greenhouse will be heated after heavy rains and melting snow.
Now decide how many chickens you are going to keep there. Layout of the territory depending on the number of birds:
- Rest area - about 1 sq. m. for 5 chickens.
- One nest requires 0.09 sq. It can fit up to 4 individuals.
- For simultaneous access of the entire livestock to feed, it is necessary to equip feeders based on the feeding front of one head, namely: for an adult hen - 10-12 cm, for young animals up to 2 weeks of age - 2-5 cm, and pullets (up to 140 days) 8-10 cm. Do not forget about drinking bowls, which can be made according to the same principle as in a simple chicken coop.
The rest of the territory is occupied by a walking area. In some cases, it is equipped separately from the building and is not included in the accounting when drawing up a chicken coop project.
Draw up a drawing of the greenhouse with all the necessary dimensions and only then start work, for example:

Laying the foundation
A greenhouse for a chicken coop can be built without a foundation, but it is needed in order to provide reliable protection from strong winds. It also provides an excellent basis for a strong frame with subsequent insulation of the latter.
Foundation erection plan:
- Remove the sod from the area where the chicken coop will be located. At the outer corners of the greenhouse we drive in 4 wooden stakes, towering above the ground to the height of the foundation. Drive 4 more stakes into the inner corners of the chicken coop. The distance between the outer and outer stakes must match the width of the foundation. We stretch the twine along two contours.
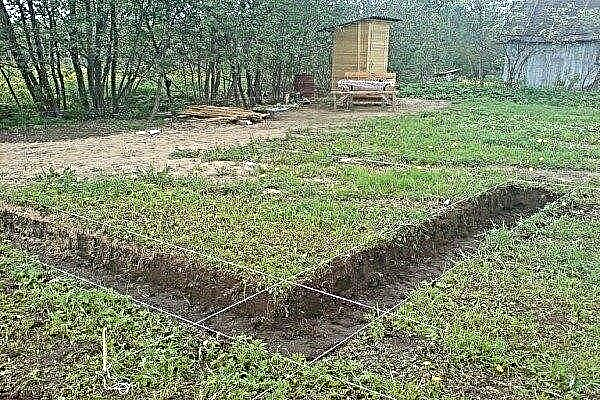
- We measure the diagonals or use the Pythagorean theorem, comparing the dimensions of the sides of the triangle to check if the angles are correct. We proceed to the trench, digging it to a depth slightly greater than the level of soil freezing. Tamp the bottom and pour a layer of sand. We are waiting for it to settle, repeat the tamping again and fill it with water. As soon as the sand is fixed and completely dry, we fill it with rubble.
The thickness of the sand and gravel layer should be 7-10 cm for each.
- We expose the formwork to a height of 5 cm higher than the extreme point, for easier leveling of the mortar. Every 30 cm of the foundation height, we reinforce it with a number of reinforcement. We fill the strips between the walls of the formwork, allowing the first to remain in their original place and not to move due to the severity of the mortar. For greater reliability, we mount jibs. We fill in the solution and compact it with a deep vibrator. Level the surface with a trowel.


When building in spring or summer, after a few days, we can dismantle the formwork and cover the base with high-density polyethylene film (or roofing felt) to prevent rapid evaporation of moisture.
There is also a less costly (both financially and temporally) way of building a foundation:
- We settle beams made of durable moisture-resistant wood into the trench.
- We pull them together with metal pins or join them according to the thorn-groove method.
Remember to treat all beams with an antiseptic before installing them.
Frame fabrication
The frame of the polycarbonate greenhouse is based on shaped pipes treated with an anti-corrosion compound. It is best to take painted materials, as paint protects the metal from rust. Pipes can be connected in two ways:
- By welding.
- With bolts.
It is recommended to resort to the first method, since the protective metal layer is damaged at the bolt attachment point, which negatively affects its reliability.
We assemble the frame in accordance with the previously prepared drawing. In places corresponding to the location of doors and windows, it is necessary to make jumpers that reinforce the frame. Door hinges and window openers are optional.

Bending of shaped pipes
Often, when erecting such a structure, it is required to bend a profile pipe. Several methods are proposed for this:
- Using the "Turbogib" tool. This tool allows you to create an even and accurate fold, while saving the user time and effort. The main disadvantage is the high cost and prevalence only in professional construction.
- Cutting and welding. The method is recommended for skilled and experienced users of welding machines, since in the clumsy hands of a beginner, the appearance of the future greenhouse will deteriorate significantly.
- Sand filling and heating. This method is characterized by a large investment of time and low cost of money. For implementation, it is necessary to fill the profile pipe with sand and heat it with a gas burner or over an open fire. The disadvantage is the high probability of getting an uneven fold and a lot of time spent.
Installation of end frames
This part of the chicken coop frame houses the vents, door and window openings. The frame can be produced as a separate module (provides greater strength) or attached to an already installed frame.
The door recess can be made as a conventional door. For its frame, a 40 * 20 mm profile is suitable, and for windows or ventilation openings, pipe frames of even smaller thickness - 20 * 20 mm - are suitable.
It is necessary to start installing the tube frame by securing the end frames.
The frames are fixed with a welding machine, bolts, using self-tapping screws (tools are selected depending on the materials from which the frame is made).
Installation of polycarbonate sheets
Rules for laying polycarbonate sheets:
- the canvases are positioned so that moisture accumulating in the "honeycomb" can come out;
- if the sheets are installed vertically, then the stiffeners should be located in the same direction;
- with a pitched construction, the canvases are located so that their stiffeners have a direction parallel to the slope line;
- arch-type frames are covered with "honeycombs" of polymeric material so that they ("honeycombs") are parallel to the lines of arcs.
The sequence of installation of polycarbonate canvases:
- We measure the polymer sheets on the section to be mounted and cut them off with a sharpened knife.
- We drill holes using a drill and a drill (screwdriver).
- We seal the ends of the canvases with aluminum tape and a self-adhesive base.
- Insert the cut sheets into the frame.
- Using an awl or screwdriver, we make several holes in each side of the plate and pass the twine through them, previously fastening the sheets with the frame in this way.
You can fasten elements in other ways:
- we apply polycarbonate directly to the pipe and drill a hole through it with a drill, the diameter of which should be 0.1 mm less than the diameter of the self-tapping screw;
- by purchasing special thermal washers or connecting profiles.
Greenhouse insulation
There should be no drafts in the winter chicken coop from the greenhouse, so we close up all the joints. It is recommended to install rubberized gaskets between the foundation and the frame. Treat the gaps between the polymer sheets with a sealant, which forms a plastic surface after hardening. For this, you can also use thiokol or polysulfide mastic.
Wall insulation should be based on the amount of snow and frost in your area of residence. The metal frame, with proper reinforcement and thick polycarbonate sheets, allows the walls to be insulated with precipitation itself.

Be careful and consider all of these factors, otherwise the structure may collapse.
If you live in a region with a harsh winter, the best solution to the issue of wall insulation is to install another coating layer. For this you can use:
- thinner polycarbonate (4 mm);
- lining;
- plywood;
- bubble wrap.
Cover the space between the 2 layers with mineral wool, sawdust, foam. To prevent the new wall from accumulating moisture, tighten it from the inside with lutrasil.
Heating
So that the chickens do not get sick and feel comfortable in the new hen house, it is necessary to ensure the optimal temperature level. For layers - at least 15 ° C, for other birds - at least 10 ° C. To heat the house, use:
- Heat guns.
- Air heaters.
- Special heaters.
- Infrared lamps.
The first 3 methods are quite expensive and are more suitable for keeping elite chicken breeds. Infrared lamps are less expensive and have a number of features:
- heat the surface, not the air;
- allow to dry the litter;
- have a muffled, non-irritating light that has a calming effect on birds.
One 500 W lamp is enough for 10-12 square meters. m area. It is better to place them at a short distance from the floor, so that if necessary, you can lower or raise the device.
If you live in a region with harsh climatic conditions, and there is more than enough money to equip such a greenhouse, you can install a warm floor in it. To do this, pour 50-100 mm of sand onto the leveled ground, cover it with a protective mesh and lay an electric heating cable. On top, another layer of mesh, 50 mm of sand and twice as much soil. If a relay and a thermostat are included in the circuit, the system will work automatically.
Ventilation device
A simple polycarbonate vegetable greenhouse is equipped with at least 2 vents per 10 sq. In winter, they can be opened only at not too low temperatures and in calm weather.
In this case, exhaust fans are installed (for chicken coops - quiet models with an air speed of less than 2 m / s), which circulate air and expel it outside the room. Try to choose a product with a power regulator and thermostat with a temperature range of 10-25 ° C and a capacity of at least 300 cubic meters. m / h.
Devices are installed on the frame of the greenhouse: one is above the door, the second is opposite. To protect the fan from adverse environmental factors, an inertial grille is required, the flaps of which open from the air flow and close automatically as soon as the device stops working.
Lighting
Daylight hours for chickens should be 12-14 hours, but not more. In summer, this norm is fulfilled automatically, and there is no need for additional lighting, which cannot be said about winter.
A reliable source of energy will be 20 W energy-saving lamps. One such device is enough for 12 sq. m of the chicken coop area. In areas where chickens rest and lay eggs, it is best to use minimal lighting to create a cozy atmosphere. Place more powerful lamps in the walking area.
An economical way to illuminate the greenhouse is to install 2 time relays in the circuit. During evening feeding, the first energy-saving lamp with a power of 20 W turns on, burns for 2-3 hours, then automatically turns off, and another one of lower power (9 W) turns on for 1 hour.
Optimal time for additional light sources:
- from 6 to 9 am;
- from 6 pm to 9 pm.
Litter
Fermentation bedding can be purchased at specialty stores. To begin effective work, it is mixed with sawdust, oat husks and straw. This mixture collects the droppings and enters into a chemical reaction with it, as a result of which additional heat is released. The unpleasant odor almost completely disappears.
The litter is changed 2 times a month, removing the old layer, or a new one is poured over the old one (method of "non-removable litter").
Hay is also common as bedding material, but it needs to be changed frequently.
How to make a feeder and drinker?
We will acquaint you with several methods of arranging feeders and drinkers:
- Bunker feeder. Grain in it is poured automatically in descending order. To make a feeder, you will need a plastic bucket and a serving tray. The first step is to cut holes at the bottom of the feed bucket.

We fix the tray to the bottom of the bucket with wire or bolts.

We install the finished feeder on the floor or hang it in a convenient place.

- Feeder from 2 bottles. Take the first vessel and cut it by 2/3. We make holes in the walls, large enough so that the chicken head can easily fit in them. The whole bottle is filled with grain, turned over and placed in the second. For the grain to be automatically fed as it decreases, the neck of the second container must be 1 cm from the bottom of the first.

- A saucer-type drinker. The base of the container is designed in such a way that it can withstand an inverted jar or bottle.A small distance remains between the neck and the bottom, due to which water flows in as the birds consume it.

To assemble such a structure yourself, you will need a tin can and a plastic bottle. We cut the jar to a height of 7 cm, process it with a file (so that the chickens remain safe and sound). Place the bottle over the jar so that the neck does not touch the bottom.

Features of keeping birds in a chicken coop in a polycarbonate greenhouse
If you leave birds in the coop for the winter, be prepared to provide them with regular care, good and nutritious food. The diet of chickens must be varied:
- dry grain mixtures;
- specialized combined feed;
- wet mash of vegetables, herbs, cereals and feed;
- bran steamed in water.
You can also delight them with food waste, sliced fish, cottage cheese, dried grass and boiled vegetables.
To keep the egg production of chickens at the same level as in warm seasons, provide the birds with optimal temperature and lighting conditions.
A chicken coop in a polycarbonate greenhouse is a great solution if the chickens have nowhere to winter. The main thing is not only to build the building correctly, but also not to forget about its internal structure.